
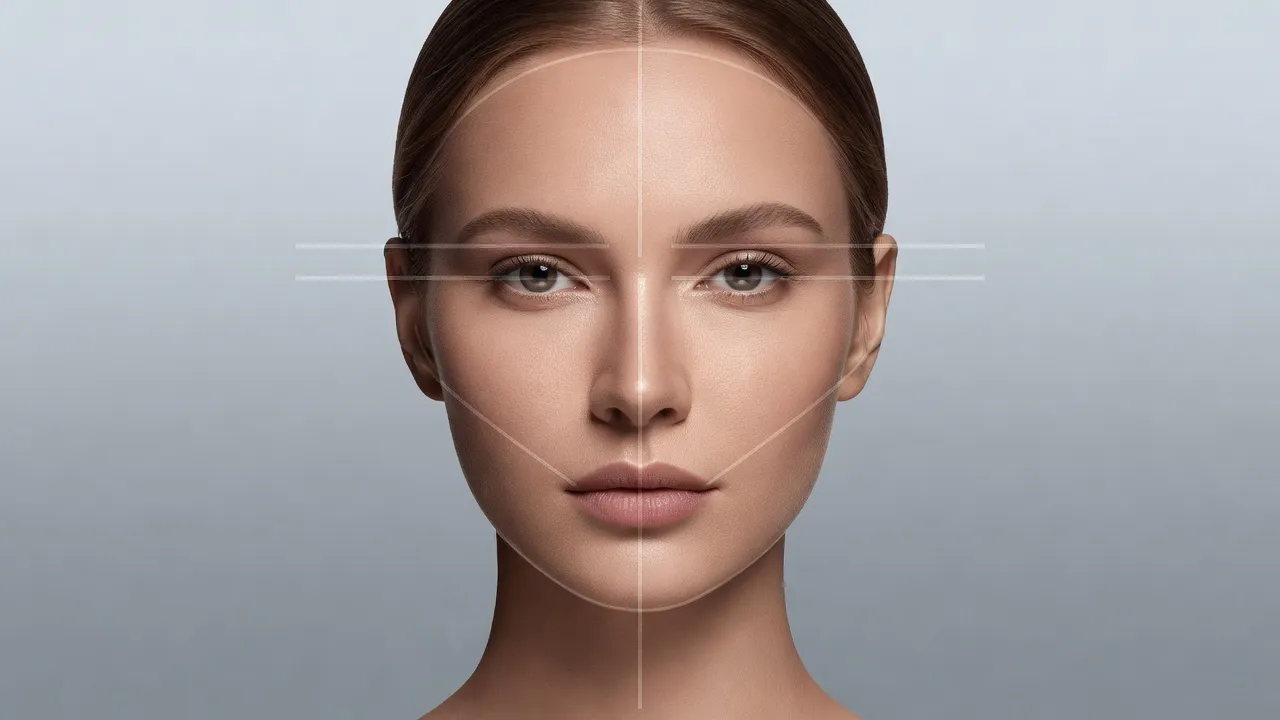
A face front view (or front facing face) is a direct, full-frontal photographic orientation where the camera sensor sits perpendicular to the horizontal axis of the eyes. In biometric security, clinical dermatology, and visual aesthetic mapping, this straight-on perspective isolates facial symmetry, structural proportions, and surface contours without distortion from tilt or rotation. As of October 2026, advances in mobile camera sensors and AI depth mapping have transformed the frontal portrait from a static ID picture into a high-precision diagnostic canvas.
Capturing an accurate frontal perspective requires control over lens distance, lighting, and head posture. Minor variations in camera placement can warp features, making the nose appear larger or the jawline narrower than it exists in real life. Understanding how to capture and evaluate a front-facing image is essential whether you are applying for official identification, setting up professional headshots, or analyzing your facial geometry.
What is a face front view and why is it crucial for facial analysis?
A face front view is the standard optical baseline for measuring facial proportions because it exposes key skeletal landmarks without perspective bias. By positioning the camera directly in front of the subject, visual algorithms and human evaluators can map horizontal distance and vertical alignment simultaneously.
This specific angle aligns the interpupillary line (an imaginary line drawn between the centers of both pupils) horizontally with the camera frame. It allows observers to accurately calculate structural metrics, such as the face width height ratio and the division of the face into upper, middle, and lower thirds. When the head is turned even five degrees to the side, perspective compression skews these measurements, obscuring true dimensions.
| Facial Region | Boundaries | Division |
|---|---|---|
| Top Third | Hairline to Brow Line | Forehead / Eyebrows |
| Middle Third | Brow Line to Nose Base | Nose / Cheekbones |
| Bottom Third | Nose Base to Chin Tip | Lips / Jawline / Chin |
Facial symmetry mapping relies heavily on this straight-on view. According to research documentation on Wikipedia's Facial Symmetry reference guide, subtle bilateral differences exist in almost all human faces, but measuring them requires a zero-degree rotational baseline. A pure front view highlights how feature placement on the right side compares to the left side without angular interference.
Evaluating these proportion lines from home used to require physical callipers or graph paper overlays. Today, mobile tools automate this analysis. The Glow Up & Attractiveness Test app ($9.99/week) allows users to upload a single front selfie to receive a detailed face analysis from a fine-tuned AI model, offering personalized scores, structural breakdowns, and tailored beautification tips.
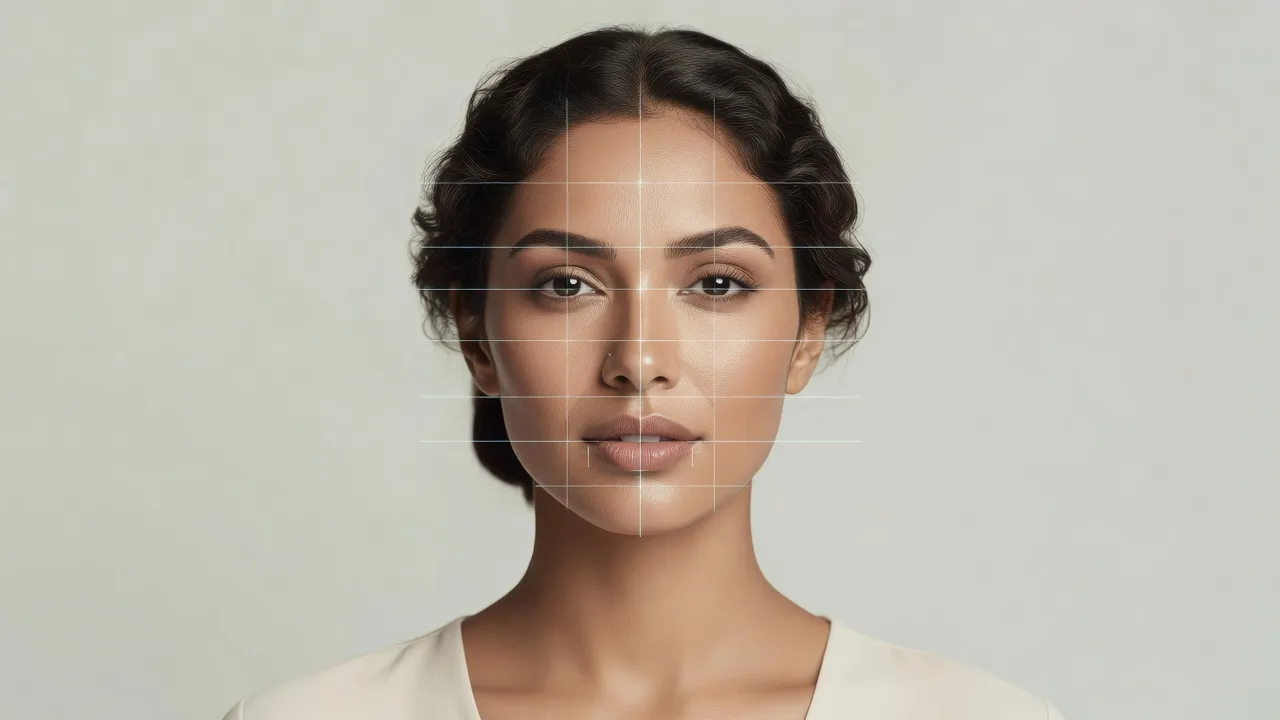
How head posture skews facial symmetry readings
Pitching or rolling your head by even a few millimeters distorts the perceived size of your jaw and forehead. Pitching the head downward accentuates the forehead and shrinks the chin, while tilting the head back exaggerates the jawline and narrows the upper face.
To maintain neutral alignment, align the tragus (the small cartilaginous flap of the ear) horizontally with the lower rim of the eye socket. This plane, known in physical anthropology as the Frankfort Horizontal Plane, ensures that facial landmarks remain in their true spatial positions during photography.
The physics of the front facing face: Lens focal length and distortion
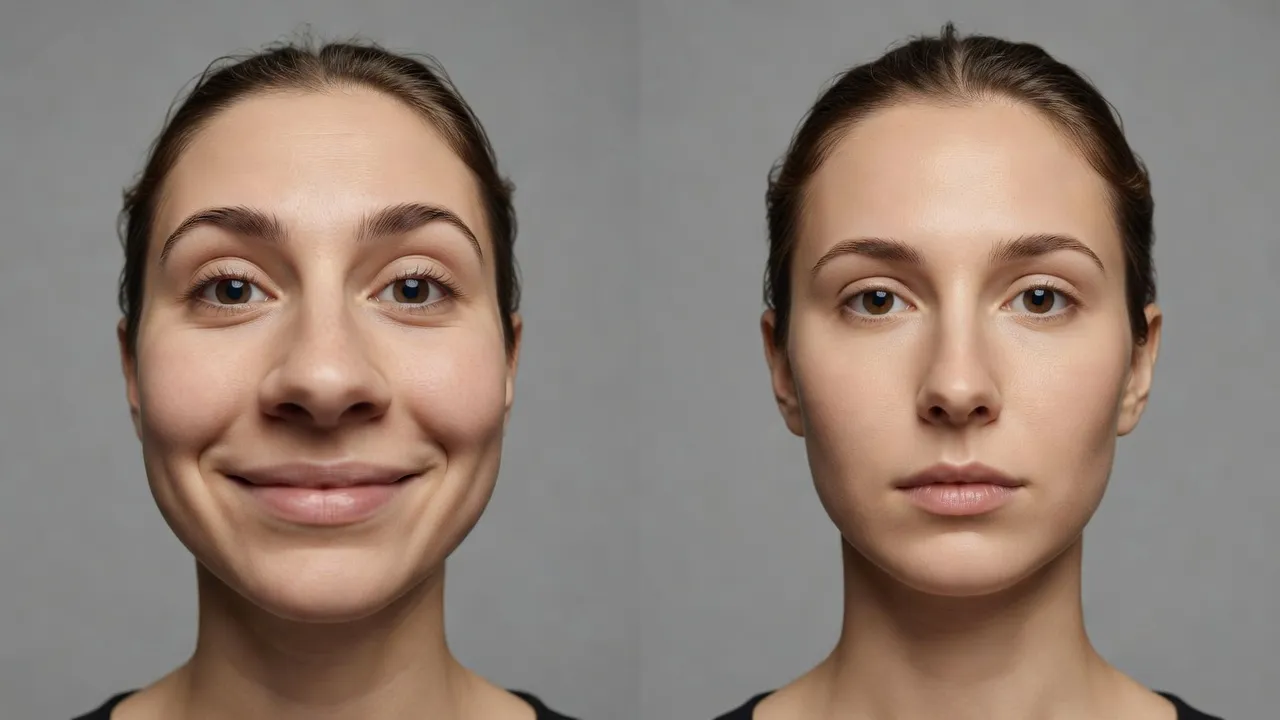
Front-facing smartphone cameras warp facial features because their wide-angle lenses (typically 23mm to 28mm equivalent) are designed to capture wide scenes at close range. When taking a selfie from arm's length, the camera lens sits roughly 12 to 18 inches from your nose.
At this close proximity, elements nearest to the camera lens expand relative to elements further back. Your nose, lips, and central forehead appear enlarged, while your ears, temples, and jawline drop back into the background.
| Camera Distance | Distortion Effect |
|---|---|
| 12 Inches (Wide Selfie) | Prominent nose, narrow face, hidden ears |
| 4 Feet (2x Zoom / Crop) | Balanced features, natural ear-to-cheek ratio |
| 8 Feet (Telephoto Lens) | True skeletal proportions, flat perspective |
According to camera lens hardware specifications published by Canon's optical research guides, a focal length between 85mm and 105mm delivers the most accurate portrait proportions. Because front smartphone lenses lack this optical compression, taking a front-facing selfie close up creates a false perspective of your true facial shape.
To capture an undistorted front facing face using a mobile device, step back at least four feet and use a 2x or 3x optical zoom setting. Alternatively, have someone else take the photograph from across the room using a standard lens. This physical distance flattens the optical field, giving you an accurate capture of the planes of the face.
Technical specifications for capturing a face front view
Capturing a frontal portrait requires different lighting, dimensions, and backgrounds depending on whether the image is meant for government biometrics, visual AI testing, or professional media.
The table below breaks down the technical standards required across these primary use cases as of October 2026:
| Capture Purpose | Ideal Lens Distance | Lighting Setup | Background Standard | Expression & Pose |
|---|---|---|---|---|
| Official ID / Passport | 4 to 6 feet (Cropped to 2x2") | Flat, shadowless daylight | Solid white or off-white | Neutral, mouth closed, eye-level |
| Aesthetic AI Analysis | 3 to 5 feet (Front camera) | Even front-facing soft light | Plain neutral background | Neutral, full face visible, no hair covering brow |
| Corporate Headshots | 6 to 8 feet (85mm lens eq.) | Key light with subtle fill shadow | Blurred office or textured backdrop | Natural smile, slight shoulder angle, head straight |
| Clinical Dermatology | 3 feet (Fixed mount) | Cross-polarized studio flash | Matte gray background | Neutral, no cosmetics, pinned back hair |
What is the best app for taking a passport photo in 2026?
Passport Photo Booth App Simple and Smartphone iD are the top-rated apps for taking passport photos in 2026 due to their automatic biometric verification engines. These applications evaluate lighting, contrast, and head geometry to prevent official rejections.
Official Passport Photo Requirements:
[x] 2x2 inches (51x51 mm) size
[x] Head height between 1" and 1-3/8" (25-35 mm)
[x] Taken within the last 6 months
[x] Plain white/off-white background
[x] Direct frontal posture (no tilt)
Government passport agencies enforce strict rules regarding head dimensions and facial exposure. The official U.S. Department of State Passport Photo Guidelines specify that passport photos must present a full face front view, measured strictly from the bottom of the chin to the top of the hair.
Dedicated passport applications use machine learning algorithms to scan your upload in real time. They remove the existing background, calculate the exact ratio of the head relative to the frame boundaries, and warn you if shadow gradients compromise your facial features.
How do you take a passport or ID photo using a smartphone app?
To take an official passport or ID photo with a phone app, mount your phone at eye level four feet away against a plain wall under indirect daylight. Doing this ensures that your image passes government compliance checks on the first upload.
- Find diffused, directional light: Stand facing a bright window, but avoid direct sunlight, which casts harsh shadows under your nose and eyes.
- Setup a clean background: Stand three feet in front of a white wall. The gap between you and the wall eliminates dark shadows behind your ears.
- Mount the camera correctly: Place your phone on a tripod or stable surface at eye height. Do not hold the camera in your hand, as arm length alters lens angle.
- Maintain neutral facial posture: Look directly into the camera lens with a neutral expression. Keep both eyes open, your lips pressed naturally together, and your shoulders relaxed.
- Run the app's scanner: Capture the shot using a timer or remote release, then open the image inside your chosen ID photo app to auto-crop to the mandatory 2x2 inch format.
What is the best ID photo app for iPhone and Android?
Smartphone iD and Photo AiD are the best cross-platform ID photo apps for iPhone and Android because they combine automatic background removal with human compliance review. Both apps work seamlessly across iOS and Android systems to ensure your photo matches global biometric standards.
Older mobile apps simply drew a static oval overlay on your screen and left the lighting up to chance. Modern 2026 ID apps use AI background isolation to strip away room clutter and swap in an approved solid white canvas without creating halo artifacts around your hair.
These applications also calibrate image dpi (dots per inch) and file sizes to meet digital submission limits. Many platforms offer print-to-door delivery alongside digital downloads, giving you physical copies formatted for driver's licenses, visas, and identification cards.
What is the best app for taking a profile picture in 2026?
Remini and PhotoRoom lead for technical image enhancement, while specialized beauty platforms analyze your front view to help you pick your best look. Creating an engaging profile picture requires a balance between lighting clarity and flattering visual proportions.
When taking photos for online profiles, a pure front facing face projects confidence, directness, and transparency. If you want to evaluate how your facial symmetry and styling read on camera, mobile applications offer immediate feedback. Using Glow Up & Attractiveness Test, you can scan a frontal selfie to view personalized symmetry breakdowns, receive style recommendations, and unlock custom AI image previews that show your optimized look.
Structuring your profile setup thoughtfully is essential when curating photos for dating profile use. Combining crisp front-facing shots with natural environmental photos ensures your profile looks authentic rather than overly processed.

How to fix front-camera lens warp without buying new gear
You can eliminate selfie camera warping by capturing your photo from six feet away and cropping the image manually. You do not need an expensive digital camera to fix perspective distortion on a mobile device.
Set your phone's built-in camera timer, step back five or six feet, and stand straight facing the lens. Once captured, crop the background out using your phone's native photo editing tool. This simple technique compresses the perspective optically, giving your nose, jaw, and cheeks their natural physical proportions.
How do you take a professional headshot using a phone app?
To take a professional headshot with a phone app, capture a front view in portrait mode under soft lighting, then use editing software to refine the background. Modern smartphone processing produces corporate headshots that match high-end studio quality.
- Position yourself near a large light source: Stand opposite a large window or softbox light so illumination spreads evenly across both sides of your face.
- Engage Portrait Mode: Turn on your camera's Portrait Mode setting to create an optical depth map, blurring background distractions automatically.
- Align your facial axis: Keep your head facing the camera directly while turning your chest 15 degrees to the side. This subtle angle adds dimension while preserving a direct facial view.
- Edit with headshot tools: Open the capture in apps like Portrait AI or Canva to replace casual room backgrounds with professional office interiors or neutral backdrop textures.
Frequently Asked Questions
What does a face front view mean?
A face front view is a portrait photographed straight on, where the subject looks directly into the camera lens with their eye line parallel to the horizon. This alignment eliminates perspective angles, offering a clear layout of facial features and symmetry.
Is a front facing face the best angle for facial symmetry analysis?
Yes, a direct front view is the only angle that allows for accurate symmetry analysis. Side angles or tilted perspectives warp facial proportions and compress features, making equal measurement between the left and right sides impossible.
Why do I look different in a front facing selfie compared to a mirror?
Selfies look different because front-facing phone lenses are wide-angled and positioned close to the face, expanding central features like the nose. Mirrors reflect light flatly without lens warp, giving a more physically accurate representation of your face.
How far should the camera be for an accurate front view photo?
The camera should be positioned four to six feet away from your face. Capturing a photo from this distance and cropping in prevents the lens distortion common in close-up selfies.
What is the difference between a face front view and a profile view?
A face front view captures the face straight on to highlight symmetry and feature spacing. A profile view captures the side of the head at a 90-degree angle to reveal the jawline, nose bridge, and facial depth projection.
Can I use a selfie as an official passport photo?
No, hand-held selfies are generally rejected for official passports because arm-length perspective warps facial proportions. Passport photos must be taken from at least four feet away using a tripod or captured by another person against a plain background.
Why do passport apps require a neutral facial expression?
Biometric passport scanners compare distance markers between facial landmarks like eye corners and mouth edges. Smiling or raising eyebrows shifts these physical landmarks, which can trigger automated biometric scanning errors at border controls.