
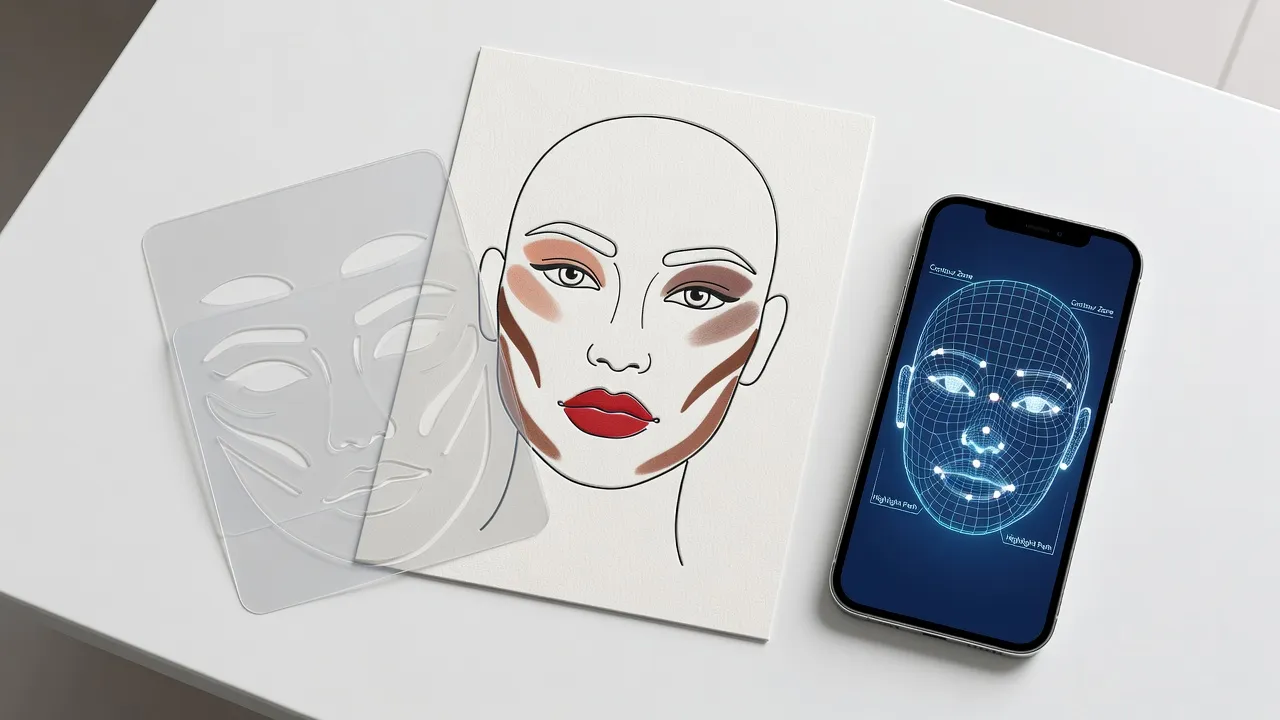
Face guides are physical stencils, printable makeup chart templates, or digital facial mapping software designed to identify aesthetic landmarks on the human face for precise cosmetics application, beauty planning, or symmetry evaluation. Unlike generic makeup tutorials, a face guide translates abstract aesthetic principles—such as the golden ratio, bone structure angles, and light reflection points—into clear visual lines on a specific facial canvas.
Understanding which format to use comes down to one variable: whether you need a physical template for instant product placement, a paper sheet for creative practice, or an intelligent digital scan for individual ratio analysis.
What are the different types of face guides?
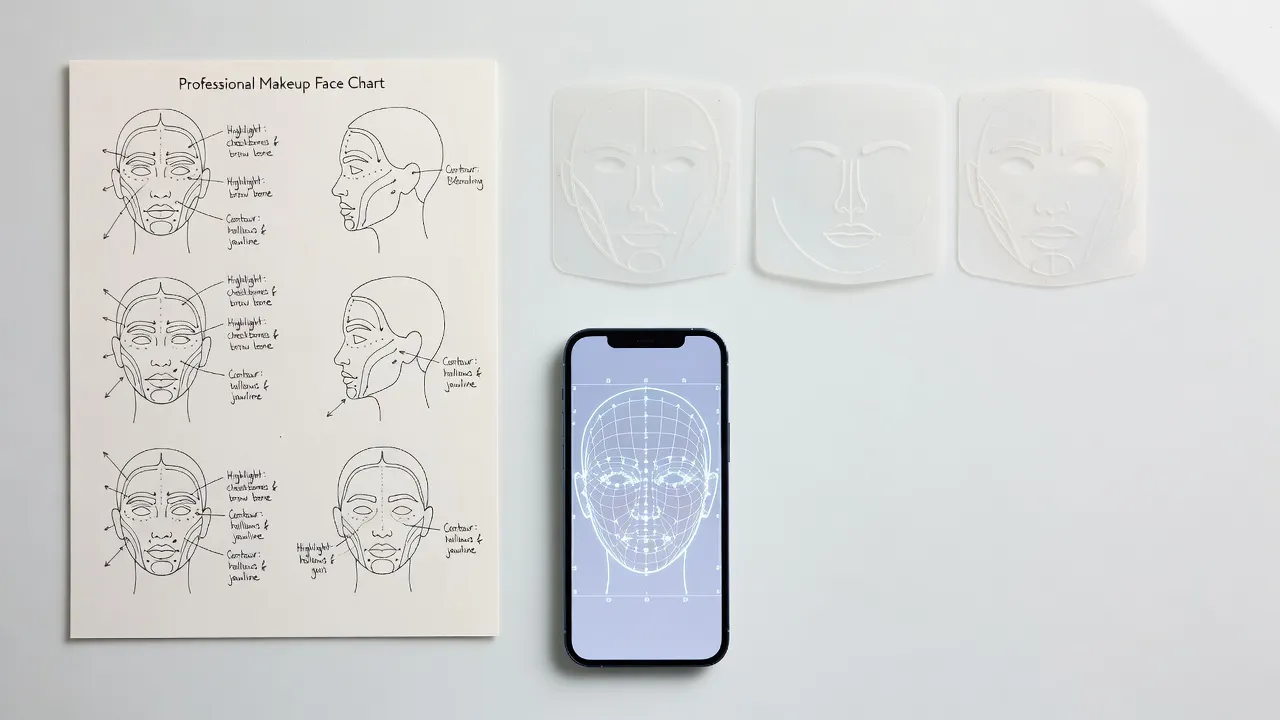
Face guides fall into three primary categories: silicone physical stencils, paper-based makeup artist charts, and AI-powered digital face mapping apps. Each format serves a distinct operational purpose depending on whether you are working directly on human skin, drafting cosmetic looks on paper, or assessing facial proportions digitally.
- Physical Stencils: Flexible silicone or plastic templates that rest directly on the skin to mark eyeliner wing angles, nose contour lines, or eyebrow arches.
- Paper Face Charts: Printed blank outlines of human face shapes used by professional makeup artists to plan color placement, test formulas, and document client formulas.
- Digital AI Guides: Software algorithms that overlay virtual grid lines onto a selfie to measure structural dimensions, calculate symmetry, and provide tailored aesthetic recommendations.
The choice between these formats depends heavily on your skill level and goal. Stencils give immediate mechanical guidance for beginners, paper charts offer creative control for working artists, and digital guides analyze individual bone structure without manual measurement.
What are the best face guide stencils for contouring cheekbones and nose?
The best face guide stencils for cheekbones and nose contouring are flexible silicone shields like the Benefit Cosmetics They're Real! Liner & Shadow Guide and reusable multi-angle stencil pads. These physical tools pressed against the cheekbones or nose bridge isolate the target zone, preventing cosmetic product from bleeding past your natural bone structure line.
- Align central bridge line
- Keep parallel side slots tight
- Sweep shadow down vertical edge
When selecting a physical contour guide, look for medical-grade silicone rather than rigid plastic. Rigid plastic does not bend to accommodate variations in cheekbone prominence or wider nose bridges, which creates harsh gaps and uneven shadow lines.
- Silicone Contour Cards: These feature angled cutouts designed to fit directly beneath the zygomatic arch (cheekbone) to help sculpt shadow depth cleanly.
- Nose Bridge Guides: Dual-slotted physical templates that hold parallel lines equidistant from the center of the nose, making straight nose contouring effortless.
- Multi-Use Beauty Stamps: Molded flexible wedges that press defined shadow angles along the jawline and cheekbone in one motion.
For targeted sculpting around prominent cheekbones, physical stencils eliminate the guesswork of where to place dark contour cream versus light highlighter accents.
What are the best face charts and face guides for makeup artists?
The best face guides for makeup artists are textured paper face charts from brands like MAC Cosmetics and specialized digital face chart apps like BeautyClout. Professional artists use these guides to sketch looks, keep client records, and map shadow placements before major photoshoots or bridal appointments.
| Feature | Included |
|---|---|
| Brow Arch & Tail Map | ☐ |
| Eye Socket Planes (Crease Line) | ☐ |
| Zygomatic Shadow Zone | ☐ |
| Cupid's Bow Alignment Marks | ☐ |
Paper face charts require heavy, absorbent watercolor-grade paper (typically around 80lb to 100lb stock). Standard printer paper causes real makeup products to smear or bleed, ruining the texture translation.
- MAC Cosmetics Official Face Charts: The industry standard paper guide printed with neutral feature outlines that accept real powder, lipstick, and eye shadows smoothly.
- Papercraft Professional Artist Pads: Multi-page booklets featuring various head shapes (round, heart, square, oval) to practice facial correction techniques for different clients.
- Procreate Digital Face Chart Stamps: Vector-based brush sets imported directly into iPad design software for digital beauty illustration and high-resolution client previews.
Understanding facial anatomy: planes, proportions, and symmetry
A face guide works by translating underlying skull anatomy—specifically bones, facial fat pads, and muscle attachment points—into flat geometric markers. Mastering these natural guidelines allows you to enhance features logically rather than applying color arbitrarily across the face.
The key structural area to map is the system of anatomical planes. As detailed in our breakdown of the planes of the face, your head is not a flat surface; it consists of angled surfaces that catch light or hold shadow differently based on environmental lighting.
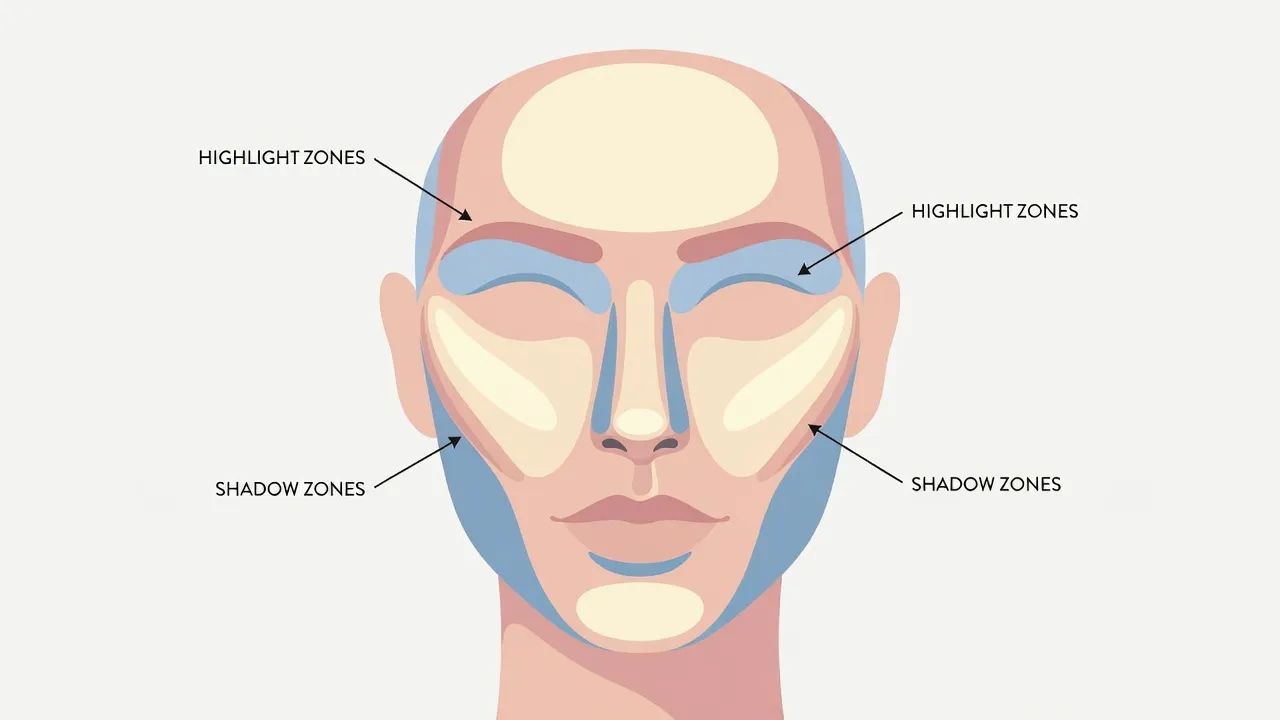
Key anatomical landmarks every face guide uses include:
- The Zygomatic Arch: The cheekbone line running from the ear canal toward the corner of the lip, serving as the main contour anchor.
- The Supraorbital Ridge: The brow bone line that defines the depth of the eye socket.
- The Nasolabial Fold Zone: The natural structural division separating the center of the face from the mouth region.
- The Mandibular Line: The lower edge of the jawbone that dictates lower face width and symmetry balance.
Evaluating these landmarks manually can be tricky because human faces are naturally asymmetrical. Calculating metric balance like the face width height ratio requires accurate measurement anchors that stencils alone cannot calculate.
Comparing physical stencils, paper charts, and AI digital face guides
Choosing the right face guide tool depends on whether your priority is instant physical application, creative pre-planning, or automated facial metric analysis. The table below compares how these three approaches perform across key beauty workflow criteria.
| Feature / Criteria | Physical Silicone Stencils | Paper Artist Face Charts | AI Digital Face Guides |
|---|---|---|---|
| Primary Use Case | Direct product application on skin | Sketching, planning, and client logs | Automated symmetry & proportion analysis |
| Skill Level Needed | Beginner (hand-held tool) | Intermediate to Advanced | Beginner to Professional |
| Individual Personalization | Fixed shape (does not adapt) | Custom drawn by artist | Dynamic (scans unique face shape) |
| Portability | High (pocket-sized plastic) | Medium (paper pads/binders) | High (smartphone application) |
| Cost Range | $5 - $25 one-time purchase | $15 - $40 per pad | Subscriptions or free trials |
Note: Pricing and availability parameters reflected in this table reflect standard market pricing in 2026.
While physical stencils give quick assistance for single tasks like an eyeliner wing, they fail to adapt to unique facial bones. Paper charts give complete artistic liberty but require significant manual drawing skills. Digital AI applications bridge this gap by analyzing your actual face structure in real time through smartphone sensors.
How AI facial analysis provides personalized face guides
AI-powered digital face guides analyze your selfie to generate custom visual overlays tuned directly to your individual bone structure, eye spacing, and jawline angles. Rather than forcing a static plastic stencil onto your skin, digital scanning uses machine vision models to identify key landmarks on your face instantly.
As of September 2026, modern digital face mapping tools process over 60 distinct facial points within seconds. This technology measures symmetry ratios, cheekbone definition, and upper-to-lower face proportions with high mathematical accuracy.
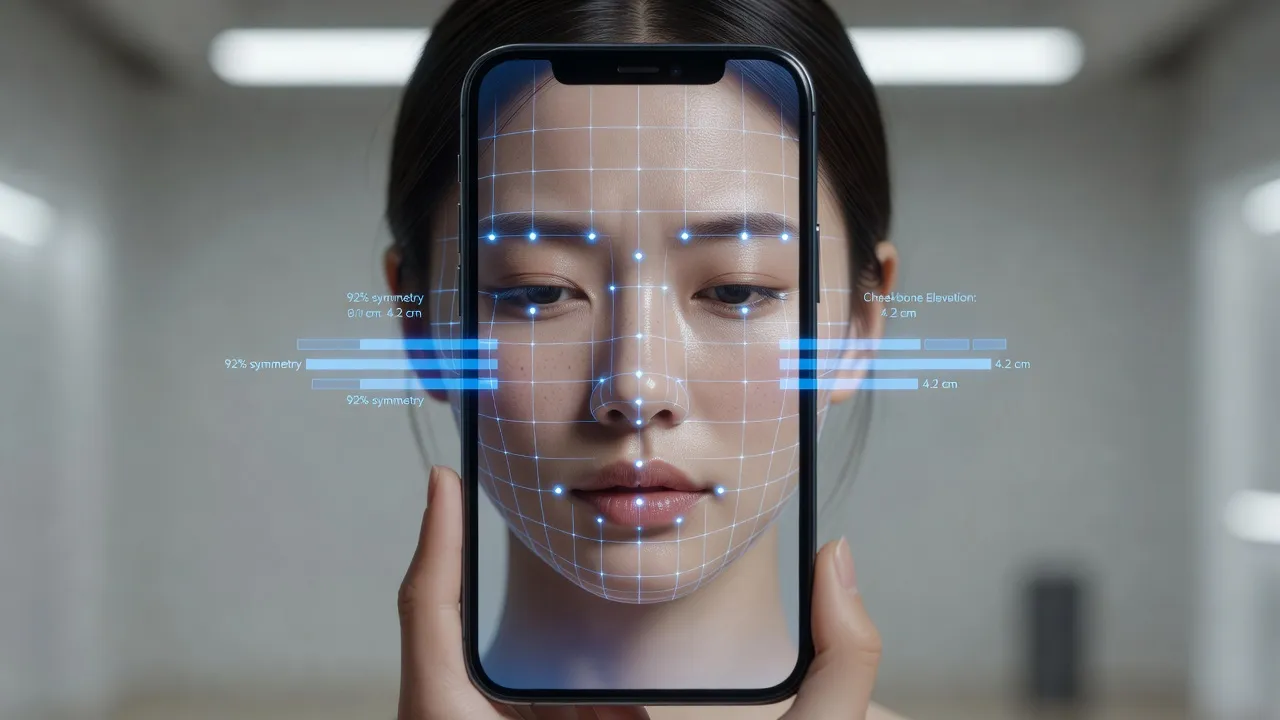
For women looking to evaluate their facial aesthetics and receive clear actionable guidance, Glow Up & Attractiveness Test provides a comprehensive mobile solution. Available on the App Store for $9.99/week, the app lets you snap a simple selfie to receive an AI-powered attractiveness score alongside a detailed facial breakdown.
- Capture clear frontal selfie
- AI maps 60+ facial landmark vectors
- Metrics calculated (Symmetry, Ratios)
- Tailored glow up tips generated
Rather than guessing where your contour lines should lie, the app analyzes your unique facial features and delivers targeted tips to beautify your look. It also unlocks your glow up potential through an integrated step-by-step beauty plan, allowing you to see your visual score and track improvements over time.
Key facial metrics measured by modern digital face guides
Digital face guides calculate specific geometric ratios—such as facial thirds, horizontal fifths, and jawline angle degrees—to determine visual balance. Understanding these underlying metrics clarifies why certain makeup styles or hair parts suit one face shape better than another.
According to research documented in the National Library of Medicine, classical facial aesthetics rely heavily on balanced proportions across three distinct vertical segments:
- Upper Third: From the natural hairline down to the line between the eyebrows (glabella).
- Middle Third: From the eyebrow line down to the bottom base of the nose (subnasale).
- Lower Third: From the base of the nose down to the bottom point of the chin (menton).
| Region | Classification |
|---|---|
| Hairline to Eyebrows | Upper Third |
| Eyebrows to Nose Base | Middle Third |
| Nose Base to Chin Bottom | Lower Third |
When a digital guide scans these zones, it identifies which third is dominant or compressed. For instance, if your lower third is shorter relative to your middle third, contouring guidelines will recommend shading beneath the jawline to create the visual illusion of length.
Similarly, horizontal spacing evaluates whether eye width matches the intercanthal distance (the space between the eyes). According to facial mapping standards published on Wikipedia's Facial Symmetry guide, a balanced face naturally fits five equal "eye widths" across the widest point of the cheeks. Digital tools highlight these proportions automatically, showing you where to extend or soften makeup lines for optimum visual balance.
How to use a physical face guide stencil step-by-step
Using a physical face guide stencil effectively requires anchoring the tool at specific facial bone landmarks before applying liquid or powder makeup. Following a methodical application sequence prevents line slipping and ensures clean, sharp makeup definitions.
- Prep skin (powder base)
- Anchor stencil to bone line
- Stipple product (don't drag)
- Lift gently and blend edges
Step 1: Prepare and set your skin foundation
Apply your liquid foundation and concealer fully before bringing out a physical stencil tool. Dust a light layer of translucent setting powder over the target area (such as the cheekbones or eyelids); dry powder surfaces prevent plastic or silicone stencils from sliding across moist skin during product application.
Step 2: Align the stencil anchor points
Hold the stencil firmly against your face using your non-dominant hand. For cheekbone stencils, place the top edge directly beneath your zygomatic bone, angling upward toward the center of your ear canal. For nose stencils, align the central line precisely down the center of your nose bridge.
Step 3: Apply product using a stippling motion
Load a dense makeup brush or sponge with cream or powder contour product. Tap or stipple the product lightly through the stencil cutout openings rather than dragging the brush back and forth. Dragging the brush pushes pigment beneath the silicone edges, creating messy, smudged lines.
Step 4: Remove gently and soften harsh edges
Lift the stencil straight outward off the skin without sliding it sideways. Use a clean, fluffy blending brush to gently diffuse the upper and lower edges of the shadow line, preserving the core structure while removing harsh tape-like boundaries.
Frequently Asked Questions
What are the best face guides for beginners learning makeup?
The best face guides for beginners are flexible silicone nose and eyeliner stencils, paired with an AI face-mapping app on a smartphone. Silicone stencils give physical assistance for difficult hand motions, while digital apps identify your exact face shape so you do not use incorrect contour techniques.
Do physical contour stencils work on every face shape?
No, physical contour stencils do not fit every face shape perfectly because plastic shapes are static and human bone structure varies widely. Silicone stencils adapt slightly better than hard plastic, but digital face guides offer far greater accuracy by measuring your unique features.
How do makeup artists use paper face charts?
Makeup artists use paper face charts by applying real cosmetic powders, creams, and pencils onto textured paper templates to plan looks for runway shows, bridal clients, or film sets. Face charts serve as a visual recipe card to record exact shade choices and placement zones.
What is the difference between a face stencil and a digital face guide?
A face stencil is a physical plastic or silicone template held against the face during makeup application. A digital face guide is software that uses smartphone camera scanning to calculate face ratios, measure symmetry, and suggest personalized makeup strategies on-screen.
Are digital face guide apps accurate for measuring symmetry?
Yes, digital face guide apps are highly accurate for measuring symmetry because they use camera algorithms to detect precise anatomical markers such as eye corners, lip peaks, and jaw angles. They calculate balance down to millimeter-level ratios that are difficult to see in a standard mirror.
Can I use a face guide to improve my nose contour?
Yes, a face guide works exceptionally well for nose contouring by setting two perfectly parallel lines along the sides of the nose bridge. This prevents crooked or overly wide lines, which are common errors when applying nose contour freehand.
How often should physical face stencils be cleaned?
Physical face stencils should be cleaned after every single use with warm water and mild anti-bacterial soap or isopropyl alcohol. Cosmetic residue buildup on plastic or silicone transfers bacteria back onto clean skin, which can clog pores and break out target zones.